

Learn in this hands-on tutorial how to handle multiple LLM models through AWS Bedrock with Langchain. You will be able to choose dynamically and seamlessly the model your chain use with Langchain LCEL.
Introduction
There are more and more LLM models available, each with its own strengths and weaknesses.(complexity, cost, specialization). This means in an LLM application, you need to be able to seamlessly use multiple LLM models without changing your entire code every time. This is exactly what we are going to see using Langchain and AWS Bedrock.
In this blog post, you will learn:
- What is Langchain and what is AWS Bedrock ?
- How to integrate Langchain with AWS Bedrock ?
- How to handle multiple LLM models in your Langchain chains ?
- How to create Prompt depending of the LLM model, here Mistral large and Claude 3 Sonnet ?
Let’s begin then.
What is Langchain ?
There are literally hundreds of Langchain explanation so I will not explain too much here (you can check this article for more in-depth information: link)
What you need to understand is:
- An LLM is not as useful when it is not connected to your ecosystem (your own data, web search, api, other AI services, …)
- You need to be able to easily integrate with a variety of tools without writing all the integration part yourself
- You need a way to write code for your LLM apps that is fast, powerful and ready to be used in production for your app with all your users
- You need a framework to access all the latest innovation in the LLM field meaning people and companies contribute a lot to the project.
This is literally what Langchain allows. You can easily create production ready code with integration ready for a great variety of tools and services (from all the LLM services, to HuggingFace, to Office 365 files to Google search to weather API) and use all the latest available techniques for RAG.
What is AWS Bedrock ?
AWS Bedrock is a platform provided by Amazon Web Services (AWS) that simplifies the process of using and fine-tuning LLM models and related technologies like Vector Store for RAG use cases. It is a completely managed service, meaning you only need to activate the models you want and you can use it easily.
On AWS Bedrock, there are a great variety of LLM models, from Claude 3 to Mistral Large, to Llama 2 to Cohere. It is comparable to Google Vertex AI, Azure OpenAI, or even OpenAI itself. The advantage of using an LLM service from a cloud provider is that you get not only the LLMs but can also use other services (for example AWS Textract which do OCR analysis on documents).
Initialize the work environment
Pre-requisites
To be able to advance through this tutorial, you will need:
- A functional AWS account where you have admin permission (check this link)
- Have access to multiple LLM models on AWS Bedrock (at least Mistral)
- An AWS user setup on you laptop (check this link)
- A functional Python environnement
Initialize the Jupyter lab
Let’s create the Jupyter lab setup. We will use pipenv to create a virtualenv for this project. Creating a virtualenv is very important as it will make sure this project will run without harming your other ones.
Also please remember to always save your code using for example github.
Install pipenv
Let’s begin by installing pipenv which will handle virtualenvs and python packages for us ( there are a variety of other like poetry but more difficult):
pip install pipenvCreate a folder and add dependencies
Let’s create a folder that will contain the jupyter notebook:
mkdir langchain-bedrock-multi-models
cd langchain-bedrock-multi-models
And add all required dependencies. We will install jupyterlab which will allow us to launch a jupyter lab notebook, langchain and boto3 to use AWS services.
pipenv install jupyterlab langchain boto3Pipenv will then create a virtualenv and a Pipfile.lock that will contains all specific versions of your libraries. This is very important as libraries in python often change and breaks you whole project so it is better to freeze package versions like this. When adding new packages, it is best practices to add them using pipenv that directly in the notebook (like in some other blogs) as you will have all your packages defined in your project.
Launch jupyter lab
Let’s launch the Jupyter Lab then and create a notebook. The AWS_DEFAULT_REGION environement variable set the AWS region to use for the commands.
pipenv run jupyter lab
You will have the following screen. On this screen create a new notebook by clicking on the Python 3 button.
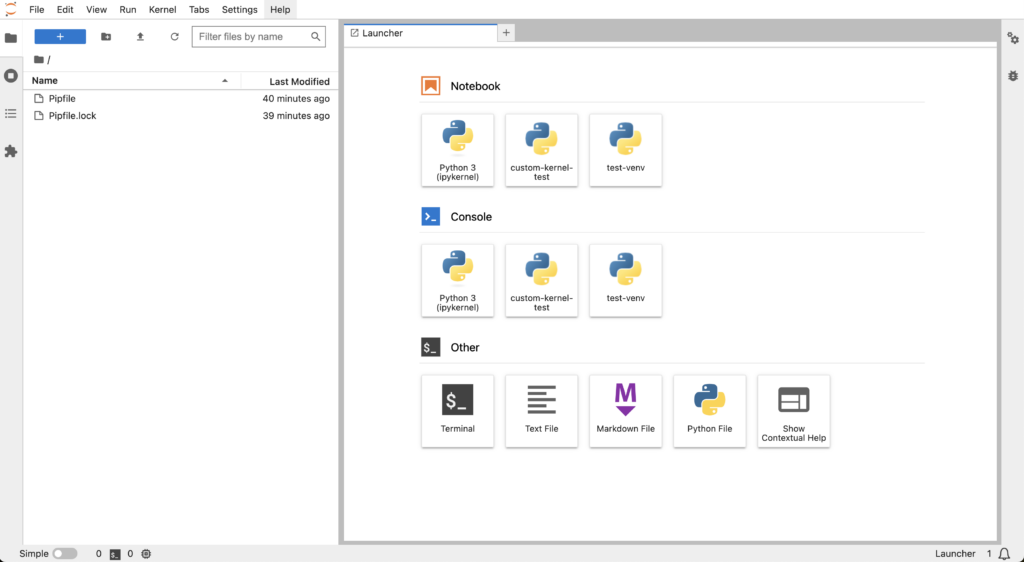
This will create an untitled notebook. Press Ctrl + s or (Cmd + s on Mac) to save it and rename it, for example langchain-bedrock-multi-models.ipynb.
Create the configurable multi LLM Langchain chat
Here we will create, using Langchain, a configurable LLM interface that can handle multiple LLM models in AWS Bedrock.
from langchain_community.chat_models import BedrockChat
from langchain_core.runnables import ConfigurableField
Here’s what is happening in this code:
- We import the
BedrockChatLangchain component that allows to use the AWS Bedrock models. - We also import
ConfigurableFieldwhich will allow us to make this component configurable..
aws_region_name = "us-west-2"
credentials_profile_name = "default"
claude_3_sonnet = "anthropic.claude-3-sonnet-20240229-v1:0"
mistral_large = "mistral.mistral-large-2402-v1:0"
In this code snippet, we setup the aws profile and region you are using and also the LLM model ids we will be using.
mistral_large_bedrock_chat = BedrockChat(
    model_id=mistral_large,
    credentials_profile_name=credentials_profile_name,
    region_name=aws_region_name,
)

_model_alternatives = {
    "mistral_large": mistral_large_bedrock_chat
}

claude_3_sonnet = BedrockChat(
    model_id=claude_3_sonnet,
    credentials_profile_name=credentials_profile_name,
    region_name=aws_region_name,
)
In this code snippet, we create:
- The
BedrockChatcomponent to use the Claude 3 Sonnet and Mistral Large models. - The
_model_alternativesthat will allows use to create a configurable LLM interface.
bedrock_llm = claude_3_sonnet.configurable_alternatives(
    which=ConfigurableField(
        id="model", name="Model", description="The model that will be used"
    ),
    default_key="claude_3_sonnet",
    **_model_alternatives,
)
Finally we create the configurable LLM interface:
- We put the
claude_3_sonnetas the default one. - We added an alternative which is the
mistral_largemodel. - We created the key model which will allow us to change the model we use.
bedrock_llm.invoke("who are you ?")

bedrock_llm \
    .with_config(configurable={"model": "mistral_large"}) \
    .invoke("who are you ?")
Now we can finally use our configurable LLM interface:
- If we invoke it without any argument, we use Claude 3 Sonnet.
- If we give the
modelargument, we use the Mistral Large one.

Now let’s create the configurable prompt
Create the configurable Langchain prompt
Let’s create a configurable prompt, in the same manner as the LLM interface. This will allow you to seamlessly change the prompt you use.
from langchain_core.prompts import PromptTemplate

_MISTRAL_PROMPT = PromptTemplate.from_template(
    """
<s>[INST] You are a conversational AI designed to answer in a friendly way to a question.
You should always answer in rhymes.

Human:
<human_reply>
{input}
</human_reply>

Generate the AI's response.[/INST]</s>
"""
)

_CLAUDE_PROMPT = PromptTemplate.from_template(
    """
You are a conversational AI designed to answer in a friendly way to a question.
You should always answer in jokes.

Human:
<human_reply>
{input}
</human_reply>

Assistant:
"""
)

_CHAT_PROMPT_ALTERNATIVES = {"mistral_large": _MISTRAL_PROMPT}
Here’s what is happening here:
- We import and create
PromptTemplatefor Mistral and Claude which take into account specificity of each models. For example, the Mistral model wants<s>[INST]inside the prompt. - We create two really different prompts to show how powerful this system is as you could have as many prompt alternative as you want and choose them at invoke time.
- We create and alternative prompt which is the Mistral large one
CONFIGURABLE_CHAT_PROMPT = _CLAUDE_PROMPT.configurable_alternatives(
    which=ConfigurableField(
        id="model",
        name="Model",
        description="The model that will be used",
    ),
    default_key="claude_3_sonnet",
    **_CHAT_PROMPT_ALTERNATIVES
)
Now we create the configurable prompt with:
- by default the Claude prompt and with the alternative Mistral large
- we use the same key as the configurable LLM interface so that when we use a specific model, we also use the associated prompt.
Now let’s create the Langchain Chain to use our prompt
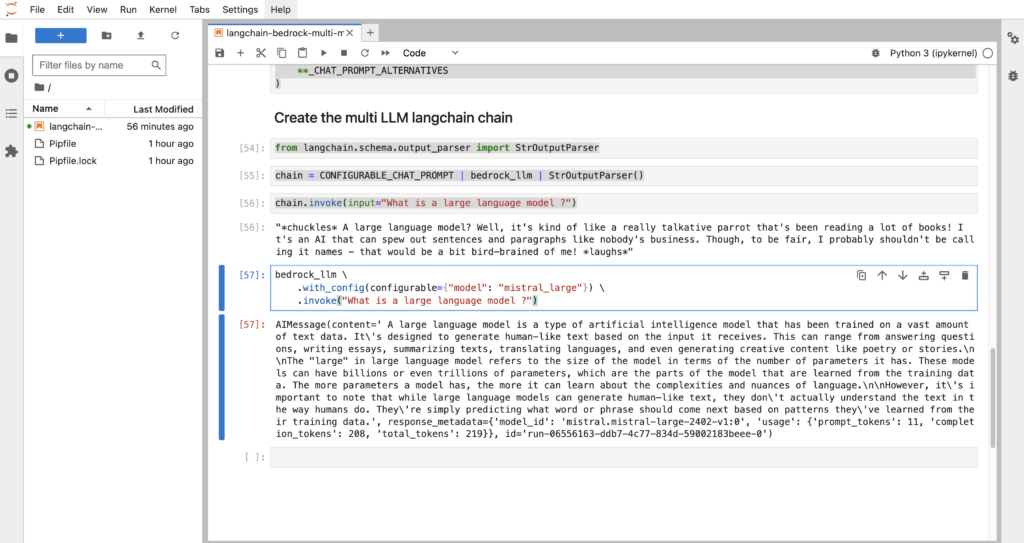
Create the configurable multi LLM Langchain chain
Let’s create the chain that will allow us to assemble all the components. In Langchain, a chain is essentially a sequence of steps or processes that are linked together to handle a task. In this case, we will create a chain that will link out configurable LLM interface with our configurable prompt.
from langchain.schema.output_parser import StrOutputParser

chain = CONFIGURABLE_CHAT_PROMPT | bedrock_llm | StrOutputParser()

chain.invoke(input="What is a large language model ?")

bedrock_llm \
    .with_config(configurable={"model": "mistral_large"}) \
    .invoke("What is a large language model ?")
Let’s see what is happening here:
- We import
StrOutputParserthat will only be used to transform the output of the chain into string to be printed - We create the chain where the each output of a component go as the input of the next component. The
|is kind of like the pipe operator in bash. - Finally we invoke the chain, with and without arguments. This means you have a completely configurable chain on your hands with very little code.
Conclusion
Now you can see the magic of Langchain configurable components. With just some lines of code, you have created a nearly production-ready and configurable Langchain chain that is using AWS Bedrock. You are awesome!
But this is only the beginning, you can do so much more. For example, you can create different prompt types and have alternative depending of the use case with complex chains. You integrate easily multiple LLM from very different origins with very little code and use them as you want. This is really the power of Langchain, making all this LLM stuff simple to integrate.
Afterward
I hope this tutorial helped you and taught you many things. I will update this post with more nuggets from time to time. Don’t forget to check my other post as I write a lot of cool posts on practical stuff in AI.
Cheers !
Have you figured out how to do this using .with_structured_output()?